From a fresh box to a working AI workspace.
Every customer receives a private, preinstalled Promethea at their own address —
e.g. https://yourco.functionalaisolutions.com/. This guide walks the
whole first-run journey: create your owner account, sign in, and let the in-app
Onboarding Agent configure the system with you — one confirmed step at a time.
Overview
A Promethea box arrives empty and sealed to one company. Nobody has logged in yet and there is no data inside. Onboarding turns that blank box into a governed, permission-aware workspace: an owner account, the company's departments and groups, its people, its documents, and a data-sovereignty policy. You can do all of it by hand from the admin pages — but you don't have to. The Onboarding Agent reads what's already set up, tells you the next thing to do, and offers to do it for you as a one-click Approve button.
The five-minute journey
The whole path, from the URL you were handed to asking your first question:
Your preinstalled URL
When your Promethea is provisioned, you're given a private address on the
functionalaisolutions.com domain and an owner email. There is nothing to
install and nothing to download — it's a live, TLS-secured instance dedicated to your company.
Open it in any browser:
https://yourco.functionalaisolutions.com/Because the box hasn't been claimed yet, the very first person to open it is greeted by the one-time setup screen rather than a login form.
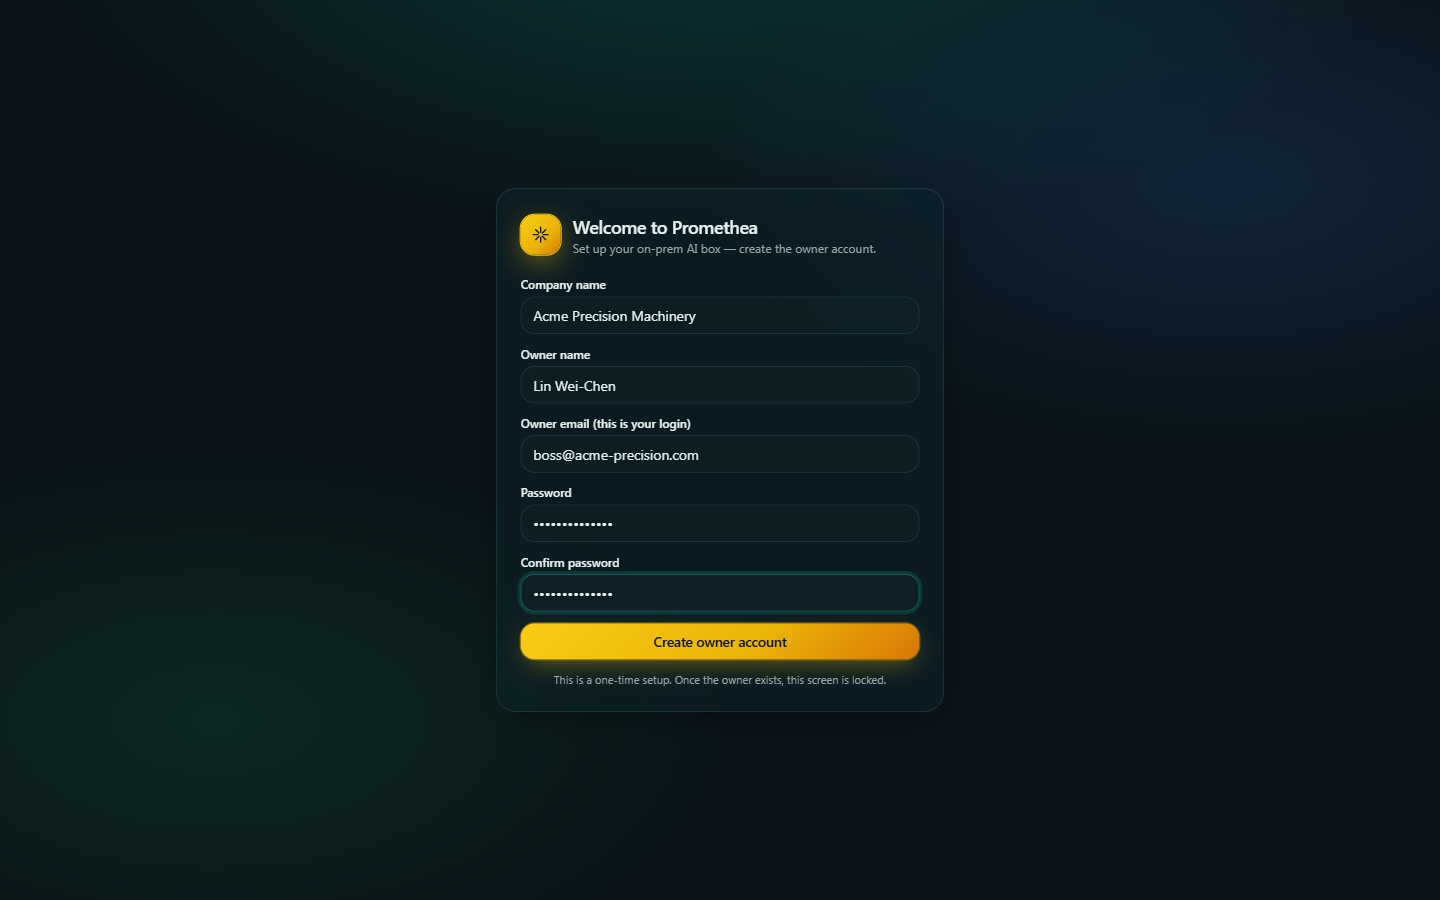
First-run setup — create the owner
On a brand-new box, Promethea shows a short first-run form. You enter your company name and the owner's name, email and password. That's all it asks: the owner is the first administrator, and everything else is configured later — with the agent's help.
Sign in
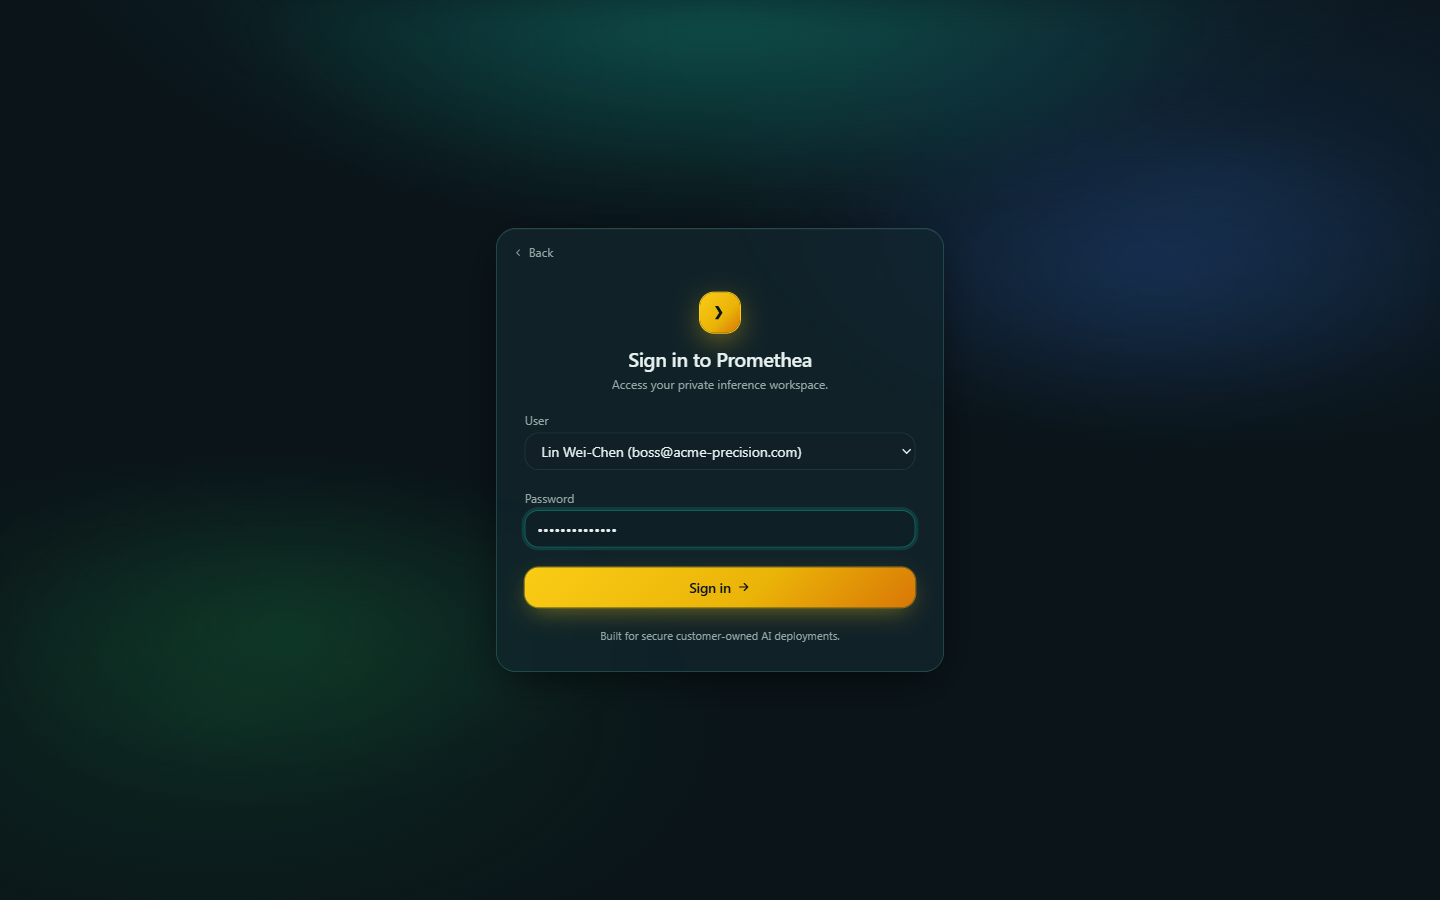
Setup drops you straight onto the sign-in screen with your new owner account pre-selected. Enter your password to enter the workspace.
Meet the Onboarding Agent
Once you're in, open Onboarding in the sidebar. The page has two halves that work together:
- Setup progress (left) — a live checklist of seven readiness items with a progress bar and live counts of users, groups and documents. It reflects the real state of the system, updating as you go.
- Setup assistant (right) — a chat with the Onboarding Agent, powered by Claude Sonnet 4.5. It greets you, looks at what's already configured, and focuses you on the next incomplete step.
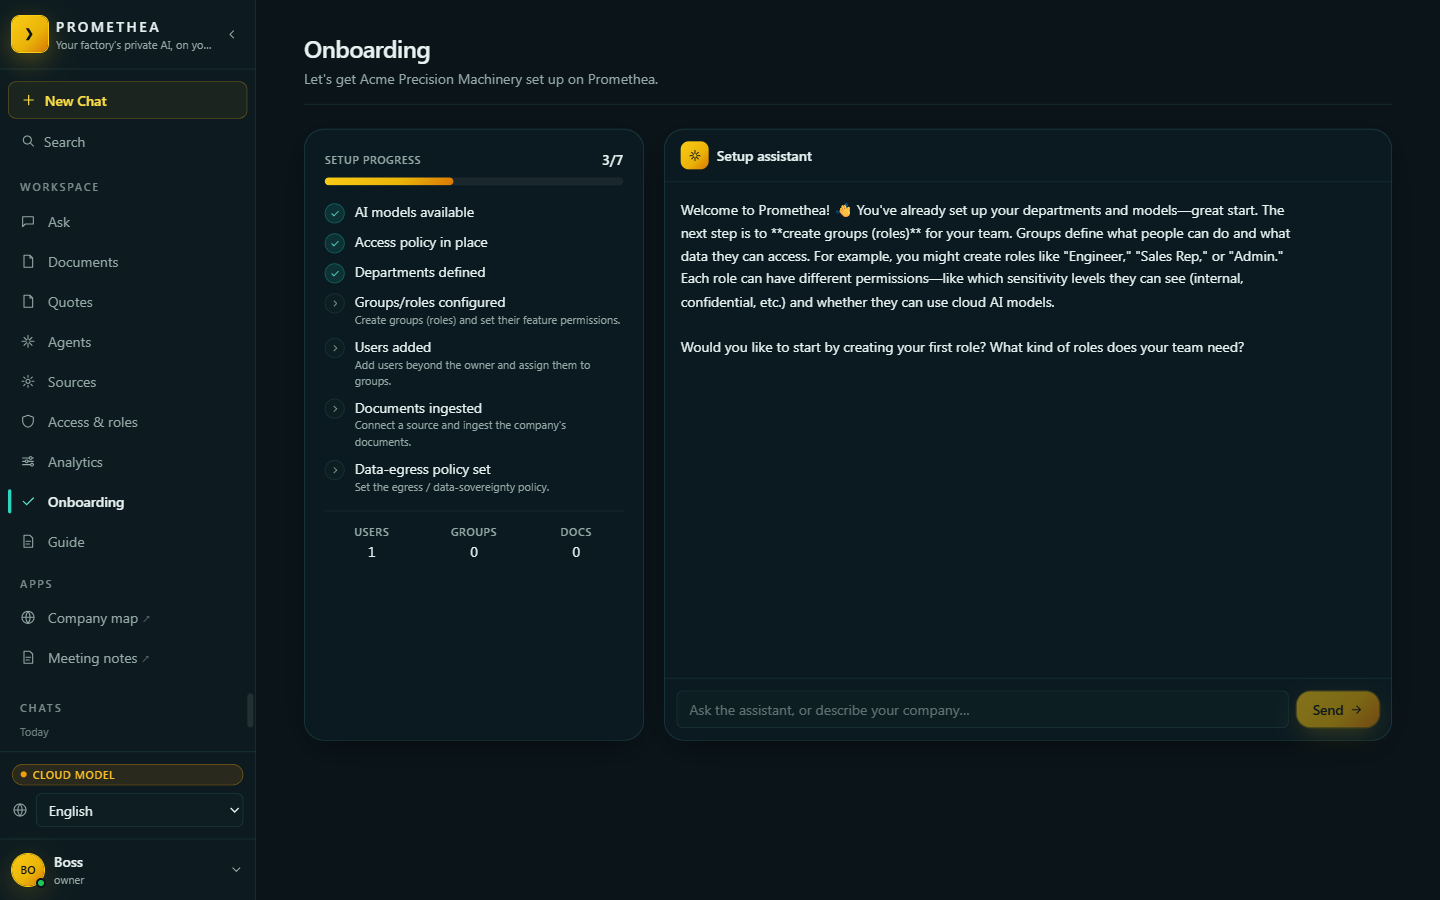
You talk to it normally. Tell it about your company — "we have engineers, sales staff and managers" — and it translates that into concrete setup actions.
Approve, step by step
Instead of running commands, the agent proposes each change as a labelled card with an Approve button and a plain-English description of exactly what approving will do. You stay in control: review it, ask for changes, or approve.
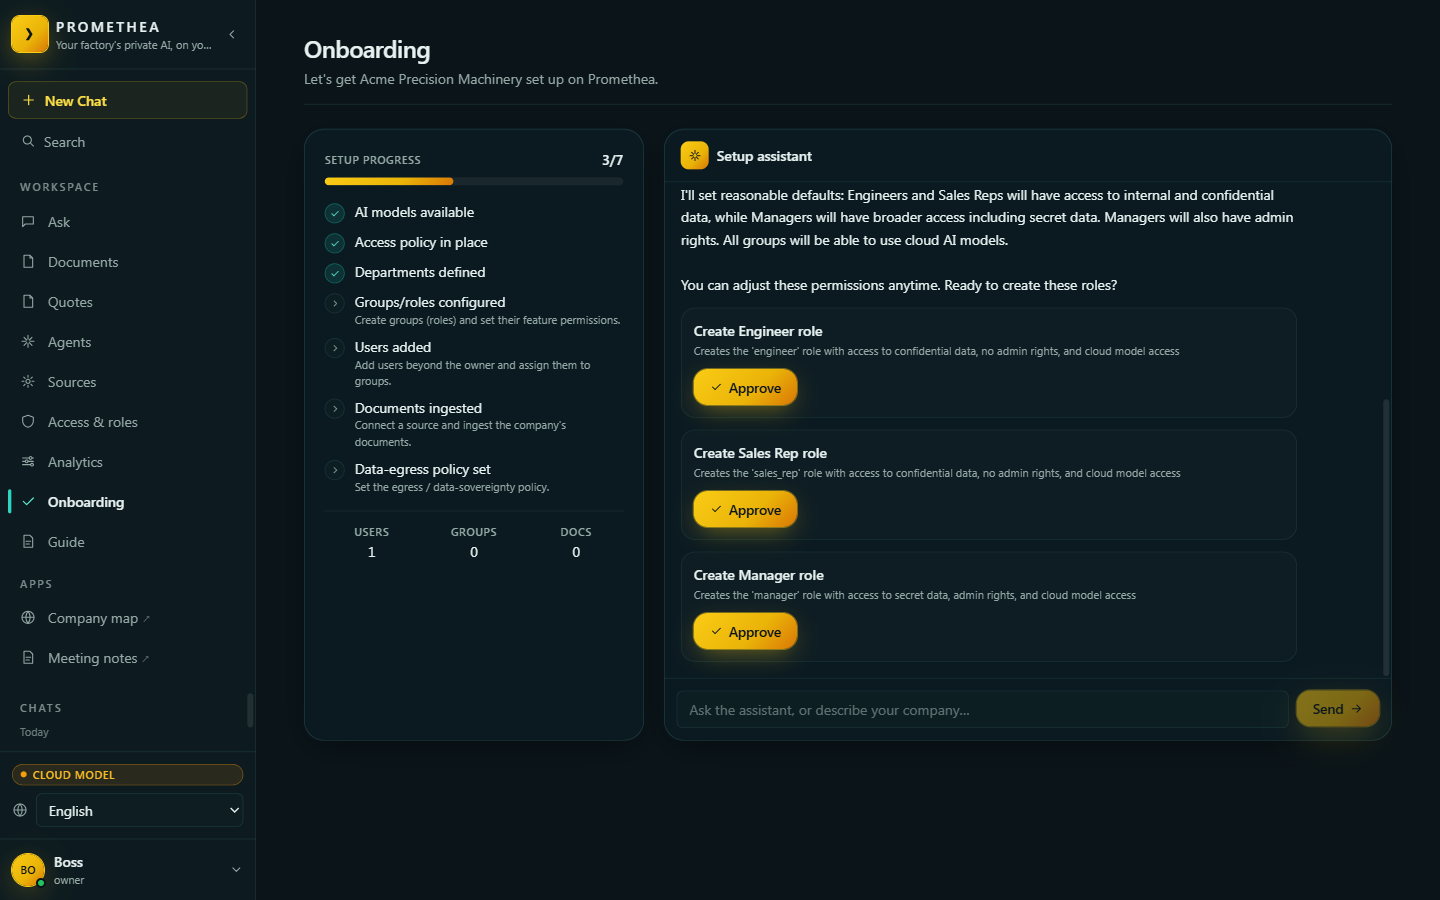
Each button is independent. Approving one performs just that action, records the result inline, ticks the checklist forward, and the agent moves you on to the next step — while any actions you haven't approved yet stay exactly where they are, waiting for you.
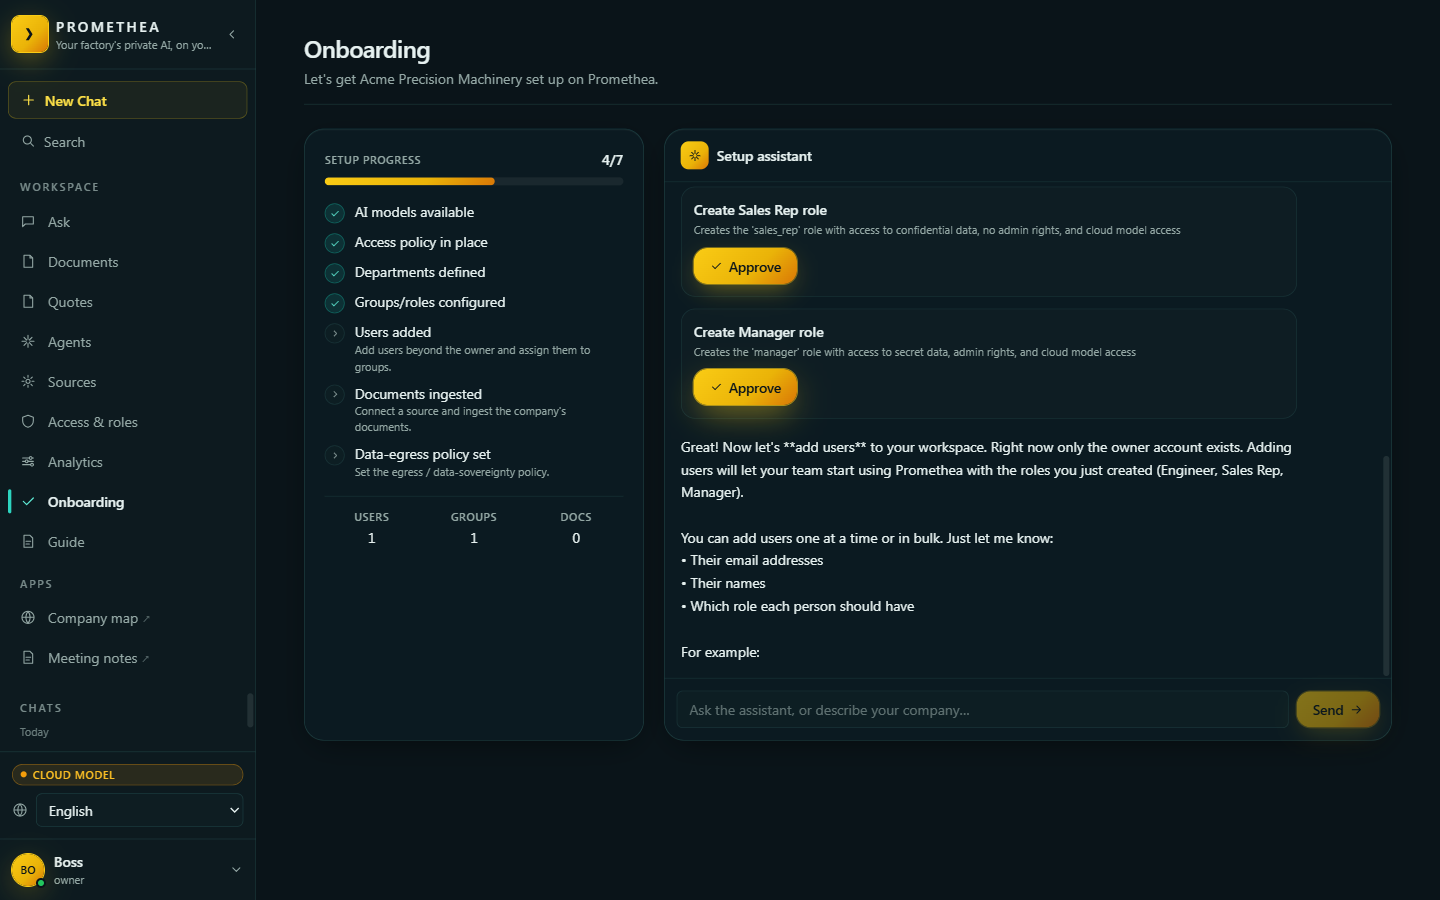
You repeat this rhythm — the agent proposes, you approve — until the checklist reaches 7 / 7: departments, groups, users, an ingested source, and a data-egress policy all in place.
What the Onboarding Agent can do
On approval, the agent performs one of nine governed action types. Each maps to the same admin function the UI uses, so anything the agent does, you could also do by hand — and all of it is recorded in the tamper-evident audit log.
| Action | What approving does |
|---|---|
| Add department | Creates a company department (optionally with an English + 中文 label). |
| Create group | Creates a role with its departments, clearance and feature toggles. |
| Update group | Adjusts an existing role's permissions. |
| Create user | Adds one person and returns a temporary password for them. |
| Bulk create users | Adds many people at once, each with a temporary password. |
| Assign user role | Moves a person into a different group. |
| Set egress policy | Applies a data-sovereignty template — strict or cloud_ok. |
| Ingest connector | Starts a background ingest from a connected source. |
| Escalate | Raises a support request to first-line support (see below). |
If something is missing
If you need a data source Promethea can't connect to yet — an in-house system, or a connector that hasn't been built for your setup — the agent doesn't hit a dead end. It raises a support request to first-line support: the request is saved inside your instance and emailed to the support contact, so the team can build or enable what you need. Anything built for a customer ships back into the product.
Going live
Once the checklist is complete your workspace is ready for the whole team:
- Hand each person their email + temporary password; they set a new one at first login.
- Head to Ask and query your documents — answers come back with cited, downloadable sources.
- Explore the companion apps under the same sign-on: Company map and Meeting notes.
- Add more sources any time from the Sources page — the agent can ingest them for you.
For the full picture of what the platform does after onboarding — retrieval, connectors, access control, the egress gate and agents — see the product documentation. To build a custom connector or integrate over the API, see the developer docs.
FAQ
Do I have to use the agent?
No. Every step the agent performs is also available directly under Access & roles, Sources and the other admin pages. The agent is the guided path; the manual pages are always there.
Can the agent change things without me?
No. It only proposes. A change happens only when you click its Approve button, and each proposal is independent — approving one never triggers another.
Which model powers it, and does my data leave the box?
The assistant reasons on Claude Sonnet 4.5. It sees only your setup state (counts and readiness), not your documents. Whether answers elsewhere in Promethea may use a cloud model is governed separately by the egress gate, which you set during onboarding.
What if the first-run setup screen doesn't appear?
That screen shows only until the owner account is created; afterwards the box goes straight to sign-in. If someone else already completed setup, ask them for the owner login — the box can't be re-claimed.